Showing posts with label Gifts. Show all posts

Tuesday, January 8, 2013

A New Year Brings…

A new year brings promises to all of us.  This year brings new products to inspire us, it mixes in new friends to learn from and it challenges us to think outside the box.  Last year is over and it is no longer the time to reminisce about the past, but to move on and discover what new wonders are there for us to touch, feel and create with.  

My mission this year is to challenge you to think outside what you know and experience the difference that Stampin’ UP! can make in your love of card making, scrapbooking and handmade gifts. 

The new Spring Catalog made my heart sing as I turned the020 pages.  The beautiful Vintage style is still with us and allows us to be imperfect in our creations.  Raw edges, spots of uneven ink and distressing make us feel uninhibited in our creations.  No thoughts of perfection only the results of the creative process  takes us over.  The look and feel of the beautiful Tea for Two and More Amore Designer Series Papers are irresistible.  The newest two-tone ribbons are beyond gorgeous…soft to the touch and stunning when frayed.  Don’t you just want to reach out and touch those wisps of simple sweetness? Are you excited yet? 

017Here you’ll see a few sneaks of my up and coming More Amore class.  This class offers you the opportunity to create using some of Stampin’ Up!’s newest products in your own home or join me at my home and indulge in some creative play with others looking for the same challenge. The Artisan Embellishment Kit (129328) takes center stage in the More Amore class, but several of the newest products in the Spring Catalog are included for hands on experimentation.  Details for this class can be found here.

021Join me this year as I share my passion for creating with Stampin’ UP! products and supplies.  Remember all products seen here can be purchased directly through my Stampin’ UP! website any time of day or night for your creative enjoyment. 

Thank you for stopping by to enjoy my creations and to begin your journey with me.

Enjoy!

kealsiggy 

Like what you see? What are waiting for? Contact me to get started.

Thursday, May 17, 2012

Chalkboard Fun

I just wanted to share a few projects that I designed using the chalkboard vinyl that Stampin’ UP! had carried this year in their Definitely Decorative line.  Although the rolls of vinyl are gone there are still a few chalkboard vinyl pieces that are available on the retiring list that can be used for similar projects. 

Below you’ll find three of the projects that I offered at my chalkboard vinyl class* this week to show various mediums on which to adhere the vinyl other than your walls or cabinets. If you had purchased the vinyl and have not explored its uses yet, I hope this inspires you to get it out and start using it for your summer events! 

This is a 4” x 6” frame.  A great place to leave messages.  How fun for a graduation, new college roommate, sorority sister, or friend!  Leigh and Alex decorated their mini message boards with the Decor stencils, Elegant Trio.  (Who knew chalk could be used with the Stampin’ UP! stencils! How fun!)

Here are some fun butterflies that are cute and bright for your summer parties!  TheyChalkboard Sticks can be used as plant stakes, drink swizzle sticks, package toppers, bookmarks, lawn markers,  table placards or even at a party to identify your dishes! I’m sure you can come up with plenty of other ideas too!

Personalized Gift Box

I love these little pillow boxes, but add some chalkboard vinyl and it becomes  a unique gift box that can be personalized with names, dates or your own unique artwork. Perfect  party favors for showers, weddings, graduations, birthdays etc!

Thanks for stopping by! Enjoy!

kealsiggy

*I have a couple of classes available for sale if you are interested in doing these projects on your own.  Contact me directly for details.

Thursday, April 19, 2012

Blossoms and Daisies Scratch Pad

 Blossoms and Daisies Scratch PadI have to admit I am glad that I committed to showing you 5 days of the Bright Blossoms set.  I haven’t had this much fun creating in awhile. I hope you are as excited by these fun creations as I am. 

This project came about by necessity.  I had a not-so-cute little square box of papers that hung out by my phone when someone called.  It is down to just a few sheets, so I thought why not have something cute by the phone to take messages on.  The Summer Smooches Fabric Brads were just what this project called for.  These brads are only available until April 30th.  They will not be returning with the release of the new catalog….so if you are in love with them…now is the time to order a few packages of them.  They are delightful aren’t they?

Summer Smooches Fabric Brads

Stamps: Bright Blossoms 
Paper: Basic Gray, Whisper White, Lucky Limeade
Ink: Versamark
Accessories: Summer Smooches Fabric Brads, 3” x 5” Scratch Pad
Tools: Big Shot, Daisies #2 Bigz Die, 3/8” Lucky Limeade Ruffled Ribbon, Tombow Multipurpose Adhesive, Signo White Gel Pen, Sticky Strip
Technique(s): watermark stamping

Blossoms and Daisies Scratch Pad Open

How’s I do that? I created the Daisies by die cutting 3 Whisper White and 3 Lucky Limeade Daisies.  I alternated the colored and the white daisies and then inserted the brad in the center and opened it up.  I pulled up on the petals to complete.  I did not glue all of the daisy layers to each other, but if you prefer no movement use the multipurpose adhesive to hold the daisy layers stationery.

I’m really excited by this new cuteness! Thanks for visiting today!  I’ll see you tomorrow for the last day of Summer Smooches projects!

All Stampin' UP! products can be purchased through my online store or directly through me!

Wednesday, April 18, 2012

Bright Blossoms Friend

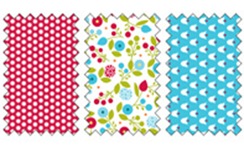
Bright Blossoms Friend Box Here we are mid-week with another Summer Smooches project!  I hope you’ve been enjoying the bright colors of summer in these projects this week!  Today I’m sharing with you the Summer Smooches Designer Fabric!  Summer Smooches Designer FabricThe Designer Fabric takes on the wonderful colors of the Summer Smooches Designer Paper PLUS adds some wonderful texture to our creations!  By adding the Big Shot Bright Blossoms Friend Box Open Multipurpose Adhesive Sheets to any piece of fabric you can do just about anything with fabric that you would do with paper!  Not tried it yet? Try mixing up your creations by adding Summer Smooches fabric.

This cute little box can contain anything from candies to 3 x 3 cards!  A perfect summer party favor! Spice up the envelope withBright Blossom Friend Card a touch of Summer Smooches for the perfect touch!

Stamps: Bright Blossoms, With All My Heart* 
Paper: Crumb Cake, Whisper White, Tempting Turquoise
Ink: Real Red, Versamark
Accessories: Brights Glimmer Brads, Stampin’ Up! Wire Works(Retired), Summer Smooches Designer Fabric
Tools: Crop-a-dile, Big Shot, Beautiful Butterflies Bigz Die, Fancy Favor Bigz XL Die, Big Shot Multipurpose Sheets, Bone Folder
Technique(s): watermark stamping

Thanks for visiting today!  Remember two more days of Summer Smooches coming your way! Enjoy!

All products are available through my online website or directly through me!


*The With All My Heart stamp set is currently on the Last Chance List.  It will only be available through the end of May.

Tuesday, April 17, 2012

Blackberries are in Season

Blackberry Pouch with Matching Card Welcome back!  This is my second day sharing a project I created using the Bright Blossom stamp set along with the Summer Smooches Designer Series Paper.

This Summer Smooches Designer Paper just screams summer!  It is bright and inviting and ready for a party!  How lucky am I that it contains two prints in green too!  I love all the Stampin’ UP! greens! Summer Smooches Designer Paper

This simple project uses what I call the blackberry stamp from the Bright Blossom stamp set!  I know it will be cute in any color, but since I’ve been thinking about summer I started thinking about some of my summer favorites and blackberries are definitely on my list of favorites!

I think this would be a great gift for a friend filled Blackberry Pouch with some ripe handpicked summer blackberries!  I know that I would love a gift of these as a little summer surprise! Can you just taste them bursting with flavor in your mouth? Are you ready for summer yet?

Stamps: Bright Blossoms Blackberry Card
Paper: Crumb Cake, Whisper White, Concord Crush, Summer Smooches Designer Series Paper
Ink: Lucky Limeade, Concord Crush, Lucky Limeade marker
Accessories: In Color Glimmer Brads, Concord Crush 1/2” Stitched Poly Ribbon
Tools: 1-3/8 Circle Punch, 1-3/4” Circle Punch, Big Shot, Fancy Favor Box
Technique(s): Two-Step Stamping, Doodling

Thank you for visiting!  See you tomorrow for more fun with the Bright Blossoms stamp set and more Summer Smooches!  Enjoy!

All products can be purchased through my online website or directly through me!

Thursday, March 1, 2012

Treat Cup Fun

These fun little cups make an ordinary project extraordinary. When we create something that appeals to more than Treat Cupsone of our senses the recipient will be overjoyed!  This month I’ll be sharing at a technique class how I created this fun little box that holds an extra surprise. Perfect for shower favors, birthday party favors and more!

These adorable little cups can hold snacks such as candies, cookies, goldfish crackers as well as other small gift items.  I thought flower seeds would be perfect for your gardener friends or birdseed for your fair weathered friends?  What unique items can you think of to add to this gift item? 

Are you missing out on all the fun because you don’t live close to me?  This cute little box template with paper cutting guide can be yours for FREE if you place a $30 online order with me during the month of March! Place a $50 Sale-a-bration online order and you can get the Enchantment Designer Paper for FREE too!  Visit my website today to place your order! Do you live near the Allen, TX area?  Contact me to reserve your seat for the class!

Thank you for stopping by!  Enjoy!

FREE template with online order!

Thursday, September 15, 2011

Pay it Forward with a Gratitude Box

Gratitude BoxSo glad you could make it over to see my newest box creation today.  This gratitude box holds a bunch of tiny cards that you can give out to anyone that makes your day special. I created 12 mini cards, but the box can easily hold twice that! 

I don’t know about you, but I am tired of focusing on “bad” service I receive when I am out.  I have been really trying to pick out the good that I see.  I have given out a couple of these cards to the wonderfully sweet polite Checker at my local grocery store, and to the happy lady at my dry cleaner who always smiles at me even though it is way too early for normal people to be up! *smile*

The 2” x2” cards were specifically designed only for a quick note, not a novel and are a Gratitude Cardsgreat way to make a connection with the people around you!  With the Anniversary of 9/11 just a few short days behind us, these connections are what holds our country together.  This gratitude box is a great way to thank someone, a friend, neighbor, colleague, or new friend for making your day.

Paper and Pixels September 2011This project was designed for the Paper and Pixels online magazine.  Step-by-Step directions for this box can be found in the September 2011 Edition of Paper and Pixels . I’m thrilled to be a part of their anniversary issue!

All Products are Stampin’ UP! and can be purchased through me directly or via my online demonstrator website.

Stamps: Elements of Style
Paper: Mocha Morning Specialty Designer Series Paper, Crumb Cake Cardstock, Window Sheet
Ink: Versamark, Jet Black Stazon
Accessories: 1/8" Early Espresso Taffeta Ribbon, Crumb Cake Seam Binding, Antique Brads, Clear Embossing Powder
Tools: Tabletop Paper Cutter, Paper Cutter with Score Blade, Hobby Blade, Ruler and Pencil (household items), Sticky Strip, Paper Snips, Heat Gun

Thank you for stopping by and for your comments!

Enjoy!

My Stampin' UP! Website


Can you see me doing a happy dance? ;0)

Monday, August 8, 2011

Collaged Butterfly Gift Card Holder

I want to take some time to share with you one of the things that I have been creating.  I’ve been waiting to hear the outcome of the contest I entered before I posted this most recent project. Collaged Butterfly Gift Card Holder Closed I am overjoyed to say that I placed first in the Seaside Crafts contest!  What an exciting day it turned out to be!  Free Stampin’ Up! product put a big smile on my face for sure!  I have to send out a big THANKS to all the members of the group that voted for this little treasure!

Collaged Butterfly Gift Card Holder Open This project features the technique of collage stamping. I used some of my favorite stamps with one of my newest stamps from the 2011-2012 Stampin’ Up! Catalog along with one of the items I picked up through Seaside Crafts – Clear Business Card Holders.  I turned these plain business card holders into a unique gift card holder.  I labored over what colors to use but when I was done, I found this Amazon gift card that fits the colors perfectly.  Don’t you just love that!  Next time I think I find the gift card first. *smile* This gift card holder can easily be turned into a gift that keeps on giving by including several Whisper White note cards. Perfect for any occasion.

Stamps:  Artistic Etchings, Establised Elegance, Silhouette Sentiments (Hostess – Retired 2011)*
Papers:   Whisper White, So Saffron, Basic Black
Ink:  Jet Black Stazon, More Mustard, Soft Suede, Sahara Sand 
Accessories: none  
Tools: Lace Ribbon Border Punch, Sewing Machine with Black Thread, Perfect Polka Dots Textured Embossing Folder, Beautiful Butterflies Bigz Die, Big Shot, Mini Glue Dots, Snail
Techniques Used:  Sponging, Collage Stamping

*All products can be ordered directly through me or my online Stampin’ UP! website with the exception of items labeled as retired.

Thanks for stopping by!  Enjoy!

kealsiggy


This project will be featured in my Collage Stamping technique class in September.  Interested and live in the Allen, TX area?  Contact me directly for details.

Wednesday, May 25, 2011

Springtime in Paris Card Set

Through a black and white lens

Don’t you just love it when you plan something and it just comes together naturally without a lot of rework?   Oops...did I type that?  I know you all thought I was perfect, right!  LOL! 

My inspiration for this set of cards was a grouping of blocks that had “Paris” painted on them.  Gift PackageI decided to use the bird cage to change up the words a little bit.  The bird cage from the Nature Walk set was a logical choice as the cage was thin-lined and would show the “A” through it!  I haven’t done too much overstamping except when using background stamps…but, I like it!

The background is a retired favorite of mine the Linen background stamp.  I let my fingers do the walking on the back to allow for an uneven image to appear with the Crumb Cake ink.  A little tear and some sponging finished up this All Occasion card set. 

To package a set of four cards and envies up, I Bird of PARIS decided that I needed a bird to complete the set. I used a fabric strip, some frayed ribbon and a piece of linen thread to extend the bird’s tail. I really think the extra plumage attracts the eye to these simple cards. Only a Paris bird would have so much going on, right? What do you think?

Stamps:  Broadsheet Alphabet, Nature Walk(Occasions Mini- Retired?) , Linen (Retired) 
Papers:   Very Vanilla, Basic Black
Ink:  Jet Black Stazon, Very Vanilla Craft Ink 
Accessories: Button, Linen Thread, 1-1/4” Striped Grosgrain Basic Black, fabric strip,
Tools: Two Step Bird Punch, Stamp-a-ma-jig, Clear Blocks for Alpha stamping, sponge
Techniques Used: Frayed Ribbon, Tearing, Sponging

Thanks for stopping by!  Enjoy! 

Stampin' Up! products can be purchased through me.  Email me for more information!


Tip:  Using a clear mount alpha set is a dream when creating words.  I lined up the letters on the “I” block and stamped 20 panels in minutes!

Wednesday, May 18, 2011

The All Occasion Card

Gift Folder So what have I been doing these last few weeks?  Not stamping that was for sure!  I had family and friends from out of town visiting and then a quick trip to Chicago was in order.  This past weekend I was in Waxahachie, TX at the cutest little Bed and Breakfast. If you ever are down in that area with your friends or your honey let me know and I’ll get you the information!  It was just charming!  It accommodated us four gals just perfectly!Opened Gift FolderI actually had a few minutes to begin designing these cards in Waxahachie, but only today did I have the chance to put it all together!  I love giving the gift of cards for birthdays, parties, or any other special event.  I usually like to give cards that can be used for any occasion because the recipient will use the cards that I have made for them.  If you give a set of various occasions then the possibility exists that the cards may be haunting a drawer for some time until the specific need arises. 

Close Up of ClosureThis gift set contains 4 simple cards and envelopes.  I’ve made this fun matching file folder gift packaging to hold them.  I love this long ribboned closure!  So elegant! The packaging becomes a beautiful conversation piece if left out in the open. The ribbon can be used as a necklace with the “No. 5” charm. And after the cards are used, the owner can add some dried mix packets, seed packets, etc. and regift the packaging.  I think I may have said this  4 Cards and Envelopesbefore, but I love making things that can be reused!

Please tell me…what do you think of the stripes?  I actually got the inspiration after seeing a card made with striped paper.  It was easy to create the stripes with what I had on hand and a sharp paper cutter. Scrap paper strips were handy to have for this project!

Stamps:   Clearly for You (2011 Occasions Mini), Artistic Etchings 
Papers:   Basic Black, Whisper White
Ink:  Jet Black Stazon,
Accessories: Glass Fragment,  Hodgepodge Hardware (retired) 
Tools: 1” Circle Punch, Paper Cutter, Crystal Effects
Techniques Used:  Stripes

Finished size of gift folder is 5-1/2” x 6”.

Thanks for stopping by!  Enjoy!

Place Your Stampin' Up Order with Me!

Thursday, April 28, 2011

Numbered Double Flap Card Box How To

Double Fold Card Box Well, I am glad that you liked the double flap Cherry Cheesecake inspired card box that I created last week!  I made this card box with simplicity in mind.  Numbers are all the rage right now, so I figured what a great way to make an any occasion card set!  This set contains 6 cards with envelopes.  These 6 cards took all of 10 minutesCard Box 016 to create and I even used a Stamp-a-ma-jig!

How did I make that card box? You’ll need the following supplies to get started: Paper Snips, a paper cutter with a scoring blade, sticky strip and cardstock or Designer Series Paper.  Tip: Designer Series Paper is great to work with when you want to create a completely decorated card box, however, the text-weight paper is thinner and creates for a weaker box. Using Stampin’ Up! heavier weight cardstock 80lb or greater will make for a sturdier card box.  Think about the recipient when choosing the type of paper you select.

You’ll need to start with a piece of cardstock that is 6” x 11”.  Place your paper into the Paper cutter with the 11” side on the horizontal or at the top.  You’ll be scoring at the following measurements (Do not remove the paper until you score each of these lines):  3”, 3-3/4”, 8-1/4. and 9”.  Lines are drawn in pencil so that you can visually see where you will need to score. Click on any photo for a larger version. Tip: The more accurate you are with your score lines the better the box will connect together. Step 1: Score lines as shownNow turn your paper so that the 6” side is on the horizontal or at the top.  You’ll be scoring at 3/4” and 5-1/4” OR if it is easier for you, you’ll want to make sure you have 3/4” score line on each of the vertical edges.  Step 1: Score lines as shownNext, you’ll want to make eight,  3/4” snips to the score lines as shown in the photo to create 4 tabs. Fold in tabs only.Step 2: Create tabs I  suggest using sticky strip, as it creates a good strong hold when creating boxes.  Place two strips on each tab.Step 4: Apply Sticky Strip to TabsFold along all remaining score lines.  You’ll be able to see how your box will be coming together.  You’ll be creating your bottom fold by securing the tab to the bottom sides  of the box.  Step 5: Create bottom foldDo the same to the top, by securing the tabs to the top section of the box.  You’ll have two pieces of scored pieces in the middle section of the box that are not connected to anything.  These form the sides and stabilize the box when closed.Step 6: Create top flapDecorate as desired.  Create a belly band or secure with ribbon, twine or any other materials you may have.  The smaller flap was the top of the box and the larger flap was the bottom.  As the box is square you can use the double-flaps as sides too!  You’ll have about 1/2” of overlap between the flaps.  I secured mine with Completed Card Box with Card Close Upa ribbon and a 1” circle glass fragment that uses the same numbering as the cards. The cardstock image was secured to the glass fragment with crystal effects.  I used Jet black stazon to prevent smearing of the ink.  A piece of retired hodgepodge hardware was secured to the back of the element with Tombow multipurpose adhesive so that it would “hang” from the ribbon.  The element can be used as a charm for a Simply Adorned bracelet or a necklace.  A great reusable piece.  I love gifts that keep on giving don’t you?

Stamps:   Clearly For You
Papers:   Sweat Pea Paper Pack (Retired), Whisper White 
Ink:  Jet Black Stazon
Accessories:  5/8” Organza Ribbon, Round Glass Fragment, 1” Circle Punch, Hodgepodge Hardware(Retired)
Tools: Stamp-a-ma-jig,  Paper Cutter with Scoring Tool, Tombow Multipurpose Adhesive, Sticky Strip 
Techniques Used: n/a

Thanks for visiting! Enjoy!

Email or call me with your order today!