Showing posts with label Splitcoaststampers. Show all posts

Tuesday, January 29, 2013

Add a Little Sunshine

I think I’ve always been enamored with using neutrals when I create. Easy to add touches of color when I want to.  This quick and easy card was inspired not only by my love of neutrals but also by the Featured Stamper Challenge FS312 over at Splitcoaststampers.  This wonderful greeting is one of my favorites from the Pursuit of Happiness stamp set and the reason I bought it.  And how perfect that the sun decided to peek a bit more when I took this picture.  *smile*

This card would be perfect to brighten someone’s day with a special note inside just for them.  We could all use a little sunshine in our lives and this is the perfect way…with a handmade card.

Stamps: Pursuit of Happiness, Nature Walk
Paper: Very Vanilla
Ink: Basic Black, Tangerine Tango, Sahara Sand
Accessories:  Tangerine Tango, Daffodil Delight, Pumpkin Pie Markers
Tools: 1-3/8” Square Punch, Sponges, Stamp-a-ma-jig 
Technique(s): Masking

I hope this adds a bit of sunshine to your day.  Thank you for stopping by. 

Enjoy!

kealsiggy

Saturday, July 28, 2012

Whiter Shade of Pale–Christmas in July

I always enjoy making Christmas Cards in July because it makes me think that I am ahead of the game.  Do you feel like that too?  Today, I was playing a challenge over at Splitcoaststampers here and finally making a card for So Shelli’s card challenge here. Luckily the sun was on my side today and I was able to take a couple of photos for you to look at. 

This card is all in white so my hope is that you’ll be able to see all the embossed details and capture the softness of this holiday card!  It uses some of my newest favorite stamp sets and tools from the new Stampin’ UP! Holiday Mini Catalog*.  Ooh so many items to love! Contact me to order your favorites!

Without further ado…

Stamps: Watercolor Winter*, Greetings of the Season*, Ornament Keepsakes* 
Paper: Whisper White
Ink: Whisper White Craft Ink
Accessories: Rhinestone
Tools: Big Shot, Framelits - Holiday Ornaments*, Scallop Circle Bigz, Circle Die Bigz (Retired), Dimensionals, Heat tool, Clear embossing powder
Technique(s):  heat embossing

This card is about 4-3/8” x 4-3/8”.  This photo shows July Cards 012that the back is made from the circle die as well!  I love that it stands due to the scalloped circle! It fits almost perfectly in a standard A2 envelope, and that is how I will be sending it out. This card is one of the cards that I’ll be featuring at my upcoming Christmas card class next week! 

Enjoy!


*All these items appear in the newest Stampin’ UP! Holiday Catalog.  All other items can be found in the US June 2012-July 2013 Stampin’ UP! Yearly Catalog and purchased directly through me or my online website.

Friday, April 20, 2012

Hooray for Smooches

Smooches Details I feel accomplished!  I did it….5 days of Summer Smooches!  If you missed any of the days just come for a visit to view all the Summer Smooch designs! This card incorporates the Summer Smooches Designer Paper, Fabric Brads and the Bright Blossoms stamp set!  A nice way to wrap up the week, right?! 

This unique 5.25” x 5.25” card size is perfect to showcase all the Summer Smooch wonders!

Hooray for SmoochesStamps: Bright Blossoms, Sprinkled Expressions* 
Paper: Basic Black, Whisper White
Ink: Real Red, Black Stazon, Lucky Limeade, Black Stampin’ Write Journaler (For doodles)
Accessories: Summer Smooches Fabric Brads, Gold Brads, Whisper White Baker’s Twine
Tools: Crop-a-dile, Big Shot, Tasteful Trim XL Bigz Die, Tombow Mulitpurpose Adhesive
Technique(s): Two-Step Stamping, Doodling

Thanks for spending time with me this week!  Enjoy!

All products can be purchased through my online store or directly through me!


*Sprinkled Expressions was a 2012 Sale-a-bration set.  It is no longer available.

Monday, April 16, 2012

Summer Smooches

Enjoy! Summer is just around the corner and Stampin’ Up! is offering a sampling of some of the newest products available in the upcoming catalog!  If you are like me, you’ll want to get your hands on this fun and quick two-step stamp set called Bright Blossoms now.  It will be available through the end of this month or you’ll have to wait until June!

Bright Blossoms

Over the next five days, I’ll show you some quick and easy cards that you can create using this adorable set and some of the coordinating products available during this month!  I just love the little circle…it so reminds me of lifesavers! The tangerine and limeade are perfect summer colors and I hope they get you ready for thinking about creating sweet summer projects!

The layout for this card was taken from the Splitcoaststampers Clean and Simple Challenge 166.  The card was so simple I created two in minutes! Create a bunch and give some summer smooches to a friend!Smooches 002

Stamps: Bright Blossoms, Fabulous Phrases
Paper: Whisper White, Basic Black, Lucky Limeade 
Ink: Tangerine Tango, Lucky Limeade, Jet Black Stazon
Accessories: n/a
Tools: 1-3/8 Circle Punch, Scallop Circle Punch, Big Shot, Embossing folder – Elegant Lines
Technique(s): Two-Step Stamping

How did I do that? 

To create the scalloped circle ring, first punch the 1-3/8” circle punch.  Next punch the scalloped circle over the 1-3/8” circle hole that was created.  You get just the scallop ring!  Attach ring over the stamped image and the strip!

Thank you for visiting!  Enjoy!

All Stampin' UP! Products can be purchased through my online store or through me!

Monday, March 19, 2012

Botanical Inspired

Botanical For You Full View I had some time with my family this past week to visit Dallas Blooms at our arboretum.  So beautiful to look at and enjoy with the other million people that were there during spring break!  *smile*  The flowers were all in bloom, but all the herbs were looking pretty sad.  Not sure when their blooming time is…but this card depicts the beautiful herbs at their peak. 

My card was inspired by this Pin at Pinterest as well as the Technique “crop your stamped image” at Splitcoaststampers. I figured I better start using what I’ve saved at Pinterest.  I don’t want to be just a collector.  *smile*

Of special interest, I added some concord crush ruler-lined frames around each of the cropped images.  I like it!

Stamps: Herb Expressions, You’re a GemBontanical For You Close Up
Paper: Crumb Cake, Very Vanilla
Ink: Old Olive, Crumb Cake, Stampin’ UP! Markers (Pear Pizzazz, Wisteria Wonder, Concord Crush)
Accessories: Gemstones, Sponge
Tools: Ruler
Technique(s): sponging

Thanks for stopping by!  Enjoy!

kealsiggy

Sunday, March 11, 2012

Virtual Stamp Night

I remember when I first started stamping, I discovered Splitcoaststampers.  The site offers a wonderful group of talented stampers and some great stamping challenges that I always loved to take part in.  I have not been able to play along with many of the challenges anymore, but I do when I have a chance. 

I was thrilled to have time this past Friday evening to play in the Virtual Stamp Night challenges that were planned for this past weekend!  These are a couple of the cards that I was able to create based on the challenges outlined.

Full View

This card’s inspiration was to have an image using something that you see “up in the air”  I quickly thought of flags and the use of the hat pins!  I love how easy it was to create flags with the hat pins and Designer Series Paper!  So fun!

Close Up Stamps: Sprinkled Expression Stamp Set (Sale-a-bration) 
Paper: Very Vanilla, Everyday Enchantment Designer Series Paper (Sale-a-bration)
Ink: Basic Gray
Accessories: Hat Pins(Occassions Mini), Everyday Enchantment Calypso Coral Organdy Ribbon (Sale-a-bration), Dimensionals
Tools: n/a
Technique(s): n/a

Concord Crush 3D Card The inspiration for this next card was to create a project using something that you haven’t used in 6 months or more.  As I filtered through my stash, I came across the Concord Crush ribbon and knew I had to use it on a card. The card a bit flat so I added a some daisy diecuts to a few of the flowers for dimension as well as twisted the ribbon before adhering it to the front!  I really enjoy the card more with that bit of pop off the card!

 3D Pop View Stamps: Upsy Daisy, Sprinkled Expressions Stamp Set (Sale-a-bration)  
Paper: Very Vanilla, Concord Crush
Ink: Concord Crush
Accessories: Concord Crush Ribbon, Flower Daisies #2
Tools: Big Shot
Technique(s): Shadowing, Stamping off

I hope you enjoy my weekend creations!  Thanks for stopping by!  Enjoy!

lindakeal.stampinup.net

Tuesday, January 24, 2012

Language of Thankfulness

Happy New Year!  Since it is still January, I figured I can still spew out those words of joy and excitement that comes with a new year!  Also, today is the first day of Stampin’ UP! Sale-a-bration promotion!  Remember to get your $50 orders together so that you can earn one of the lovely sale-a-bration items for FREE!

I wanted to let you know that my mother-in-law loved her box of cards!  She was so happy and looked through them all right away.  My sister-in-law looked at them next and ooh and ahhed too!  That gave me a wonderful reason to start on cards earlier in the year!  Don’t you just love resolutions?

Rue Des Fleur - Occasions Mini CatalogTo help me stay on track, I’ll be holding a monthly themed class for anyone that is interested in giving cards as gifts this year!  That will ensure that I will have 5 cards done each month for my Christmas gifts.

The month of February’s theme will be “Thank You”. So to get me working on these cards, I’ve created this lovely “Thank You”!  I really love this image of the corset and I’m really grateful that we women don’t have to wear these anymore!  *smile*

Stamps: Rue Des Fleurs (French Version – Occasions Mini Catalog) Rue Des Fleurs - Close Up
Paper: Basic Black, Whisper White
Ink: Jet Black Stazon
Accessories: Poppy Parade and Lucky Limeade Stampin’ UP! Markers, Label Framelits, Big Shot, Vintage Wallpaper Embossing Folder, Lucky Limeade Ribbon(Free Sale-a-bration item)
Tools: Bone Folder, Paper Snips
Technique(s): Coloring with Markers

Enjoy!

Click here to shop and get your Sale-a-bration items!

Wednesday, December 14, 2011

Stampin’ Up! Stamp Set Flashback

I’m still working on that box of cards for my MIL.  It is nice to have sketches to follow when you are making a box of individual cards. I have two cards to share with you today.

I spent some time cleaning up my stamp room yesterday.  As I only had a 4 inch square of usable space left to create I figured it was about time to get busy cleaning. As I was cleaning I came across some of my Stampin’ UP! fabrics and some of my favorite retired stamp sets.  It’s amazing the things that you find when you’re better organized!  *smile*

Close Up Thank You This first card uses the Mojo Monday 219 sketch from this week.  I’ve been wanting to incorporate fabric on a card and this card does just that!  I decided to add various textures to the card, so you’ll notice the fabric is bunched in places rather than simply laying flat like paper.   I was able to create that texture, by using the Stampin’ Up! multipurpose adhesive sheets.  It makes you want to touch it, doesn’t it? 

Full Card Thank You Stamps: Circle of Friendship (Retired)
Paper: Very Vanilla, Basic Black, Newsprint Designer Series Paper(retired)
Ink: Jet Black Stazon 
Accessories: Timeless Portrait Designer Series Fabric, Hemp Twine, Vintage Brads
Tools: 1-3/8” Circle Punch, 1” Circle Punch,Decorative Label Punch, Lace Ribbon Border Punch, Cropadile, Dimensionals, Multipurpose Adhesive Sheets 
Technique(s): Frayed Twine
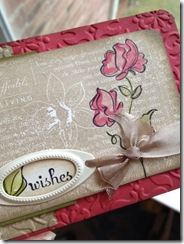
Close Up Wishes This second card uses the sketch challenge for the week from Splitcoaststampers. This card is a non-standard 3.25” x 5.5” card.  It was fun creating with some of my well loved images from the past years.  I know my MIL will love both of these!
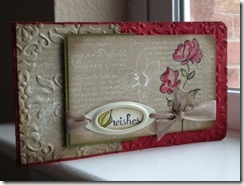
Full View Wishes Stamps: Well Worn Words (Retired), Echos of Kindness(Retired), Fabulous Phrases
Paper: Red Riding Hood Red, Old Olive, Very Vanilla
Ink: Jet Black Stazon, Red Riding Hood Red, Old Olive
Accessories: Vanilla Hodgepodge Hardware (Retired), Crumb Cake Seam Binding
Tools: Aqua Painter, Big Shot, Vintage Wallpaper Embossing Folder, Corner Rounder Punch, Small Oval Punch (Retired), sponge
Technique(s): Sponging, Big Shot Embossing

Thanks for stopping by!  Enjoy!

Thursday, June 16, 2011

A Little Sunshine

Saying goodbye to Tart and Tangy

A little bit of sunshine is what any person that is feeling under the weather needs!  This card is a response to just that…a sweet little get well card!  Tart and Tangy is a cute little set that is perfect on its own or just plain fun when paired up with an unexpected set, like Morning Cup.

Vellum Pocket Card It’s been some time since I made a pocket card but one thing lead to another and this “extra little something” pocket card came to be.  The orange slice became my background for the “card front”.  I used a vellum strip to create the pocket with no worries of adhesive showing through!  I just created a larger strip and folded it behind the large Whisper White panel and voila…no glue marks!  Do you ever amaze yourself and wonder why you hadn’t thought of that before?

Vellum Pocket Reveal This little pocket card holds an extra surprise, orange-tangerine tea, the perfect accompaniment to the orange and tea cup stamps! The tea bag is held inside a glassine envelope to keep it fresh…for how long I do not know! *smile* I would suggest placing the tea bag in when you know you are going to give the card!  The strawberry,cherry or apple would also be perfect stamps if you have those flavors of tea available!

Stamps:  Tart and Tangy(2011 Last Chance), Morning Cup, Sincere Salutations
Papers:   Whisper White, Night of Navy, Peach Parfait, Vellum
Ink:  Peach Parfait, Night of Navy
Accessories:   Dimensionals, Glassine Envelope 
Tools: Eyelet Border Punch, 1-1/4” Circle Punch
Techniques Used:
Pocket Card

Thanks for stopping by!  Enjoy!

Last Chance items are available through June 30, 2011.

Sunday, June 12, 2011

A Great Friend in Matchbox Messages

The Same But Different

So do you wake up in the morning and ponder what am I going to wear today?  I am guessing on most days, if you are anything like me, you are on autopilot and you pick out the next item of clothing you can find that is clean without thinking too much about it.  With Noah being out of school, the summer just does that to me.  Everyone will still know me whether I'm wearing the pink ruffled top or the white striped shirt because I’m still the same just different today, right? 

Clean and Simple Card StyleI took that concept into my card making.  I’ve said many times that you can take any stamp set and create about a million plus different cards with it. So, I started by selecting two different sets, Matchbox Messages and A Great Friend to create my cards with today.  I also was inspired by two challenges to help get my brain a pondering.  My first card was inspired by the Simply Less is More One Layer Challenge.  The Matchbox Messages set has two wonderful frames that fit the challenge perfectly.  I chose the vined frame as I love that it is not perfect.  I used reverse masking to place the images inside with a bit of Crumb Cake ink distressing. 

Multi - Layer Card For this second card, I selected this superior example of a card and cased it to make it my own.  I love the bright colors she used, but I think I do better when I stick to some neutrals with a touch of color.  I know you noticed that the main panels are the same but different.  As I am a big fan of gift sets, I think it would be great to create an array of these same but different cards to give as a set.  What do you think?

Stamps:  Matchbox Messages, A Great Friend
Papers:   Whisper White, Crumb Cake
Ink:  Crumb Cake, Jet Black Stazon
Accessories:   Dimensionals
Tools: Sheet of Copy Paper, Sponge, Dotted Scallop Ribbon Punch, Old Olive and Basic Black Stampin’ Write Markers, Paper Snips
Techniques Used: Reverse Masking, Sponging

Thanks for stopping by! Enjoy!

Get your Last Chance Sets while you can!

Tuesday, June 7, 2011

Friends 24-7

Goodbye to a Favorite

Full Card The revealing of the Last Chance list for the Stampin’ Up! year brings both anxiousness and joy!  The fun sets that are to be retired may bring us sadness but we may also feel excitement as new sets are to be discovered in the next month! I hope to share with you over the month some of my favorites that will be retired this month.  You’ll have until the end of the month to purchase these sets before they are no longer available. 

Close Up This card uses the Mojo 194 Sketch to show off the beauty of the Friends 24-7 stamp set which I have paired with the background set, En Francais. 

I love the softness of these colors together and of course, all the sponging!  Creating the 4 panels was a fun way to create a background panel.  If you’ve never tried it…you’ll want to! I don’t recall ever sponging on top of crimped paper before…I really like that effect too!  I hope you enjoy it too! Remember to click on any photo to get a bigger version!

Stamps:  Friends 24-7, En Francais 
Papers:   Very Vanilla, Crumb Cake, Pink Pirouette 
Ink:  Crumb Cake, Pink Pirouette 
Accessories:   Linen Thread, Very Vanilla Seam Binding, Dimensionals, mini glue dots 
Tools: 1-3/4” Circle Punch, 1” Circle Punch, Crimper, sponge, Big Shot, Beautiful Wings Embosslit
Techniques Used: Stamped Ribbon, Sponging

Thanks for stopping by!  Enjoy!

Get your Last Chance items now!

Tuesday, May 24, 2011

Secret Messages

Close Up Remember when we were kids and how you loved getting a note from your friend…you slyly opened it during class hoping no one would see the precious words that were written for you alone?  Did you just relive one of those awesome moments from grade school?  Memories are wonderful things! *smile* 

My newest creation took me back to those years!  This quick little card has a surprise greeting for the recipient.  Who doesn’t like surprises, right? 

Secret Message Card This card was quick to create as I used Stampin’ Up! newest punch the postage stamp punch and  the tried and true Heart to Heart punch!  I just love the cute postage stamp and have used it on several of my current creations.  It is about 1-1/4” square and has the lovely stamp detail!

Secret Messages Reveal The secret message is revealed by moving the top portion of the image.  The brad is the only thing holding it on…so it will move to reveal that special message only for your special recipient.  Don’t forget to let them know in your personal message that there is a special message on the front!  I stamped my message, but a personal handwritten message would be perfect too!

I know I have been using a bunch of retired product lately…but I have to use it up so bear with me if you have already used yours up! Months of no stamping does that to you!

Stamps:  Your’e a Gem (Retired)  
Papers:   Crumb Cake, Very Vanilla, First Edition DSP(Retired), Red Glimmer Paper (Retired)
Ink:  Jet Black Stazon,
Accessories: Dimensionals, Gold Brad, Black Permanent Marker(to color gold brad) 
Tools: 1/16” Handheld punch, Heart to Heart Punch, Postage Stamp Punch*, Crimper, Paper Snips
Techniques Used:  Secret Message Card

Next time you create a card, try making a secret message card and give your friend a little surprise!

Thanks for visiting! Enjoy!

Get your Postage Stamp Punch from me today! 

*Postage stamp punches are available now from the Stampin’ Up! Summer Mini Catalog!

Tuesday, April 26, 2011

The Power of Love

I wrote the title and immediately started humming the Huey Lewis and the News song. I wonder if that was played at my Wedding Card wedding?!  Well, this card was created for a wedding that has yet to be.  I’ll probably keep it in my stash of cards for that next special day in someone’s lives.  Of course, this would be perfect for an anniversary card too! I have more of those in my life now than weddings.

It didn’t take me much time to make because I used a sketch layout and some color combinations already Heart Close Upsuggested by both Splitcoaststampers and Stampin’ Addicts.  I added all the elements and I was done.  That beautiful seam binding rosette heart I created last month when I was playing around trying to figure out how to make those gorgeous ribbon roses that I’ve been seeing around.  So, yes, I created the heart element with all 19 of those individual ribbon roses out of Side View Kraft Seam Binding (SU retired).  When you have a special event it's nice to have a special card, right? And that heart actually is the icing on this card. 

Stamps:   Wedding Sweet, Tiny Tags
Papers:   Concord Crush, Very Vanilla, Crumb Cake 
Ink:  Crumb Cake, Concord Crush
Accessories:  Concord Crush 1/2” Ribbon, Kraft Seam Binding (Retired), Antique Brads, Vintage Trinkets
Tools: Full Heart Punch, Rounded Corner Punch, Jewelry Tag Punch, Tombow Multipurpose Adhesive, Vintage Wallpaper Embossing Folder, Big Shot, Snail
Techniques Used: Ribbon Rosettes made with Seam Binding

Thanks for visiting!  Enjoy!

Visit My Online Store and Stampin' UP! Website


The details for how to create the double fold box will be coming this week!  So be on the look out for it!

Wednesday, March 23, 2011

Blue Raspberry

Blue Raspberries Rule! When I was a kid…I loved blue raspberry ICEEs.  Any opportunity I had I would bug my Mom to get me one.  It’s funny that my son does the same.  What is it about blue raspberry?  I think it really is the color!  It’s just plain fun to have blue lips and a tongue after eating it! 

This card was inspired by my youth and is a tribute to all blue raspberry lovers.  I do pretend that this card is more sophisticated by adding that No. 5 in the mix though. This is an all occasion card.  Perfect for a man or a woman.  Raspberries, especially blue ones, are gender neutral!

Stamps:   Clearly For You, Matchbox Messages
Papers:   Whisper White
Ink:  Pacific Point, Old Olive
Accessories: 1” Circle Punch, 1-1/4” Circle Punch, Pacific Point and Old Olive Stampin’ Write Markers 
Tools: Stamp-a-ma-jig, Dimensionals
Techniques Used:  Spotlighting, Masking

Blue Raspberry (1)How I did that: The circle is from a set called Matchbox Messages.  It has some cute little words inside the circle…but not necessary for this “sophisticated card”.  I punched a 1” circle from a piece of scratch paper used a little snail adhesive and covered up the words being careful not to put the scratch paper over the dotted or lined circles.  It is actually quite easy because it fits perfectly.  Next, I inked up the stamp with Pacific Point ink, removed the scratch paper that is full of ink and then stamped on a piece of Whisper White Cardstock.  Voila – two circles with nothing in the middle.  I used my markers on the raspberry stamp, used a stamp-a-ma-jib and stamped inside the circle!  Harder to say than to do.  *smile*

Enjoy!

kealsiggy

Monday, March 21, 2011

Cupcake Cash Envelope

Cupcake Cash Envelope with CardIf you have your current 2010-2011 Stampin’ UP! Catalog handy you’ll want to flip over to page 91.  That cute little baby card and envelope got me thinking. And this is what I came up with…okay…the So Shelli’s Crazy for Cupcake challenge helped push me in the direction of the cupcake…but I actually first thought…how cool would that look as an Easter egg? Stream of consciousness is a great thing, no?

I think would be the perfect gift for a teen birthday! What teen doesn’t love CASH! 

Cupcake Card and Envelope OpenStamps:   Clearly For You, You’re a Gem
Papers:   Whisper White, Play Date Designer Series Paper, Pretty in Pink, Blushing Bride, Pink Pirouette, Regal Rose, Rose Red
Ink:  Chocolate Chip
Accessories: Crumb Cake Seam Binding, Itty Bitty Bits Punch Pack, Mini Vintage Tags, Shimmer Paint (mixed with alcohol in a spray bottle) 
Tools: Crimper, Tombow Multi-purpose Adhesive, Scallop Edge Punch, Bitty Box and Envelope Bigz XL Dies, Big Shot
Techniques Used:  n/a

How did I do that?  You can find a tutorial on how I created this project here.

Enjoy!

kealsiggy


This cute little card is perfect to hold a folded $50 dollar bill! It’s the perfect amount to earn a free Sale-a-bration item!  I’m not sure if a $1, $5 or $10 dollar bill would fit, but I do know a $20 fits! *smile*   The approximate size of this cute little thing is 3-3/4” x 2-3/4”.