Showing posts with label Designer Fabric. Show all posts

Wednesday, April 18, 2012

Bright Blossoms Friend

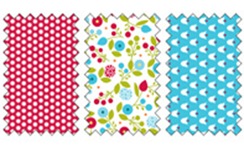
Bright Blossoms Friend Box Here we are mid-week with another Summer Smooches project!  I hope you’ve been enjoying the bright colors of summer in these projects this week!  Today I’m sharing with you the Summer Smooches Designer Fabric!  Summer Smooches Designer FabricThe Designer Fabric takes on the wonderful colors of the Summer Smooches Designer Paper PLUS adds some wonderful texture to our creations!  By adding the Big Shot Bright Blossoms Friend Box Open Multipurpose Adhesive Sheets to any piece of fabric you can do just about anything with fabric that you would do with paper!  Not tried it yet? Try mixing up your creations by adding Summer Smooches fabric.

This cute little box can contain anything from candies to 3 x 3 cards!  A perfect summer party favor! Spice up the envelope withBright Blossom Friend Card a touch of Summer Smooches for the perfect touch!

Stamps: Bright Blossoms, With All My Heart* 
Paper: Crumb Cake, Whisper White, Tempting Turquoise
Ink: Real Red, Versamark
Accessories: Brights Glimmer Brads, Stampin’ Up! Wire Works(Retired), Summer Smooches Designer Fabric
Tools: Crop-a-dile, Big Shot, Beautiful Butterflies Bigz Die, Fancy Favor Bigz XL Die, Big Shot Multipurpose Sheets, Bone Folder
Technique(s): watermark stamping

Thanks for visiting today!  Remember two more days of Summer Smooches coming your way! Enjoy!

All products are available through my online website or directly through me!


*The With All My Heart stamp set is currently on the Last Chance List.  It will only be available through the end of May.

Thursday, March 24, 2011

Unexpected Springtime Vintage Cupcake

!!WARNING!!  You may learn something new to try with your Stampin’ UP! stamps.  There is some stamping involved in this project!

Cupcake Hand Towel Folded View So, you visit to get stamping inspiration and you see a sewing project!  I know for some of you it may have stopped you in your tracks.  Who knows, you may have turned away without even giving this project a second look.  For those of you that stuck with me…I actually did STAMP!  In fact, I stamped three times with the Simple Birthday Thanks (111546) on fabric…on the wrong side even! (Okay, you may see that I stamped more than 3 times on my sample.  Just overlook that.*smile*)

Cupcake Hand Towel and Super Secret Recipe This cute hand towel is the perfect gift to give to your favorite family member or friend for her birthday, mother’s day, or other special day along with the ingredients to make some of these luscious treats.  Or give it to yourself and use my super secret recipe *smile* to create super easy cupcakes for yourself while you adore your handmade hand towel! *wink* Isn’t that ruffle just to die for?  Too cute! 

How did I do that?  I stamped with Black Stazon on the Cupcake Pieces reverse side of the Springtime Vintage Designer Fabric. (I would suggest using one of the dye-based inks so that the images wash out. The black stazon will show through on light(muslin) colored fabrics.) I stamped the cherry on one of the large roses, the cupcake top on the floral print and the bottom image on a self-pleated piece of muslin. I adhered Transfer Web and cut out each of the pieces.

I took one of my current hand towels and used it as a guide to create the size of my towel.  I used muslin fabric for the towel. All the hems were pressed at 1/2” and pressed Cupcake Hand Towel Full Viewagain at 1/2” so as to keep the frayed edges inside the hem.  I used a large zigzag stitch for all seams.  I also created a little “hook” for the top of the towel as a decorator accent.  I don’t have a hook to hang my towel on, but if you do, don’t forget to create this little add on and stitch into the top seam.  The ruffle was created using a strip of the floral and sewn to the bottom.

I adhered the cupcake and to the desired location with an iron.  Then, I pinned some stabilizer to the back before satin stitching by machine around the image in varying thread colors.  The cherry stem was done freehand with the machine.

If you are making multiples make sure you stamp several at the same time.  This will save you on time! 

Stamps:   Simple Birthday Thanks
Papers:   None
Ink:  Jet Black Stazon
Accessories:  Springtime Vintage Designer Series Fabric
Tools: Craft and Paper Scissors, Sewing Machine, Transfer Web, Stabilizer, Iron 
Techniques Used: Stamping/Sewing

I hope some light bulbs went off and you can see that your Stampin’ UP! stamps offer you more than cards and scrapbook pages! Take a step out onto your creative ledge and try something unexpected with your stamps!

Enjoy!

kealsiggy


This is your last month to take advantage of Stampin’ UP!’s Sale-a-bration promotion!  Spend $50 on products you love and earn FREE exclusive products.  Contact me today for additional details!

And…thanks to all of you that take a moment to comment!

Tuesday, February 15, 2011

Coffee or Tea for Two

This is a cute little project that I came up with last night.  It  Game Boarduses Stampin’ Up!’s beautiful Designer fabric and images along with some items that you may have around your house – bottle caps.  My bottle caps were newly acquired, but this project is perfect if you want to repurpose some of those that you may have collected and saved. I had been collecting these little pieces of “canvas” or bottle caps, for a long time and when we moved I finally decided that they would end up in the recycling bin.  *sigh*  But, as luck would have it, a friend sent me these bottle cap beauties to play with!

Packaged  Game SetThis little set includes a fabric tic tac toe game board that  doubles as a little storage bag to hold the game pieces.  One of the game pieces also doubles as the bag tie to keep the pieces inside.  I punched a small hole using a handheld punch and inserted some linen thread through the bottle cap.  The piece comes off completely and can be used as the final piece when playing. 

If you want to make your own little game board, cut nine 2-1/2” x 2-1/2” squares of coordinating fabric (5 squares in one of the colors and 4 in the other).  All seams are 1/4”.  The back of my game board is a 6-1/2 square of muslin, but you could use one of your coordinating fabrics.  I figured the muslin would show my name and copyright stamp easier! (see pages 144-145 of the current catalog for these customized stamps)   If I was more awake when I was making the bag, I would have made a drawstring tie, but I just tied the linen thread with the attached bottle cap to keep the game pieces inside. Easy Peasy!

Game Pieces You’ll need nine bottle caps for this game set. The 1” punch fits PERFECTLY on the bottle cap.  Decide on two different images.  For me this was the hardest part, choosing which stamps to use.  Stamp 5 of one image and 4 of the other.  That made me super happy!  **happy dance** Snail Adhesive worked great to keep the paper attached to bottle cap.  This may work differently based on how much humidity you have where you live so test out some of the other Stampin’ Up! adhesives if you are not getting the same results. I placed the self-adhesive covers on top of the watercolored images and I was done.

I really thought this project would be great for a party favor maybe at a Tea or a Shower.  But honestly it would be great as an anytime sugarless gift for a teacher, neighbor friend or loved one!  Don’t you think this would be a fun sugarless Halloween treat with spiders and bugs? Great for travel too!

More than Tic Tac Toe: As I was playing around with this set, I also came to think about another game to play similar to horseshoes.  Bounce the bottle cap on the table and try to get it on one of the squares. **Any of you that thought of “quarters” get back on track.  This is a family game! ** Get two points for getting it to touch the center square or one point on any of the other squares.  Be creative and come up with other games to play with the pieces available. Make sure to include instructions for the recipient!

Stamps:   Morning Cup
Papers:  Very Vanilla 
Ink: Jet Black Stazon, Rose Red, Baja Breeze, River Rock
Accessories: Linen Thread, Bottle Caps with Self-Adhesive Covers, Springtime Vintage Designer Fabric, Muslin 
Tools: 1” Circle Punch, 1/16” Handheld Punch, Blender Pens, Snail Adhesive, Sewing Machine
Techniques Used:  Water Coloring

Enjoy!

Need Stampin' UP! Supples?  Contact me today!


Sale-a-bration is underway!  Order your Stampin’ UP! products now and earn free products.  Call or email me now with any questions or to place your order.

Saturday, January 15, 2011

Thread Spool Card Holder How To

These are some samples of some mini thread spools that I created this past week.  This post is to show you how I created the spool with the card holder. Thread Spool Samples

You’ll need wire, the spool your using and some pliers.  I used Stampin’ Up!’s retired Wire Works 20-guage brass wire. I chose a heavier wire so that it wouldn’t bend easily when What You'll Needinserting the mini card. I kept the wire on the wire spool while wrapping, but if you prefer to have a section of wire, use a piece approximately 5” long.


Step 1


First, wrap the wire around the spool so that you have two complete loops. 


Step 2


Next, take your pliers and bend the wire ends so that they are at right angles (approx) from the spool.


Step 3

Gently remove the wire from the spool so that it stays intact and bring the back loop over the front loop.  This creates a bit of tension so that when you place your mini card between the two loops it is held there.  **Don’t forget this step.**


Using the pliers, twistStep 4 the two ends of the wire together and then bend towards the loop.


 Step 5


Clip the ends of the wires using your craft and paper scissors and squeeze together as necessary so that it will fit into the spool hole. You may need to widen if your spool is larger so watch how much you clip off.

Decorate your spool as desired then dip the end of the wire into some Step 6crystal effects and insert into the spool.  Allow about 3-5 minutes to dry and it is ready to hold your mini project.


Create one or a bunch of them.  A fun way to create words or names sitting on a shelf or mantle!

Enjoy!Naked Thread Spool Holder

kealsiggy


Friday, January 14, 2011

Stampin’ UP! Mini Card Fun

I’ve been sewing again…watching too much DIY channels I think!  I’ve been busy making some new pillows for the old couch to liven it up a bit!  So, when I got back to my stamping room the first thing I picked up was some of the newDesigner Fabric Mini Card Designer Fabric that is available in the new Occasions Mini!  I just love the sweet flower prints from the Springtime Vintage pattern and created a cute mini card using Stampin’ Up!’s new Sew Suite set using my clear blocks.  I never made cards this small but a stamping friend back in Illinois paved the way for this cute little thing.  (Thanks, Peggy!)  The size is a mere 1.5” x 2”. 

Now that size might ring a bell with you if you have purchased any of the beautiful Simply Adorned jewelry thatDesigner Fabric Simply Adorned Stampin’ Up! has available! This cute little card fits just perfectly (of course it does!) into the 1.5” x 2” Simply Adorned beveled glass front charm.

These charms are so great because they can change with the season, with a holiday or with your mood!  A great gift when you include some of your special pieces of hand crafted art (a mini Artist Trading Card (ATC)) or a mini card such as this one with a special message inside.  Is that sew cool or what?!  Think about using a strip of that same fabric for your chain!  I’ll have to go do that after I’m done here!

Now I couldn’t stop at the charm so I played a bit more with some mini thread spools that I just recently purchased.  Naked Thread Spool I don’t know why I purchased them, I just knew that I would come up with some kind of amazing project.  I am sure you have done that before too, right?  Well, in case you have any spools laying around you can create this fun project too! It doesn’t matter what size spool because any size will do.

I covered the spool with a strip of the Designer Fabric with Stampin’ Up!’s Snail Adhesive and added a wire loop to the top to create a mini card holder.  Tomorrow, I’ll post how I created the loop with a couple other samples.

Designer Fabric Card Holder

My mini card holder can be used to hold mini cards,  business cards, seating place cards,  extra inserts for your Simply Adorned charms or perfect to hold any mini pieces of your art work. 

Any of these projects can be used as little acknowledgments for birthdays, graduations, get well wishes or any occasion that you can create a card for.  They remain a memento that the recipient can cherish forever!

Enjoy!

Visit My Website 

Stampin’ Up! products from the 2010-2011 Idea Book and Catalog or the Occasions Mini Catalog can be purchased through my online store or through me at 214-383-4551 or 630-930-4801!  Sale-a-Bration starts on January 25th!  Qualifying Online orders and orders placed through me earn you free product!